
Build an AI-powered server log analyser with Laravel or NestJS and bounded jobs
Build an AI-powered server log analyser with authorized evidence snapshots, redacted fields, bounded queue jobs and validated findings that link back to actual records.
5 min read
In this article
An operator selects a service and asks why errors rose during the last release. A useful analyser returns a short finding with links to the relevant records. An unsafe implementation accepts a server path, reads an entire log file and sends private request bodies to a model.
An AI-powered server log analyser should start from an authorised evidence snapshot, not a raw file. This design for AI log analysis covers Laravel log analysis and NestJS through the existing queue, treats provider output as untrusted input and rehearses failures and retention.
An AI-powered server log analyser should begin with an authorized evidence snapshot. This tutorial gives the application contract, a bounded result validator and the Laravel or NestJS queue integration points. It is a blueprint to extend your existing log, queue and permissions owners, not a separate administration system.
Our NestJS long-running AI tasks guide provides the queue foundation. The distinct requirement here is preserving evidence identity through collection, generation and review.
Step 1: Define the request and persistent record
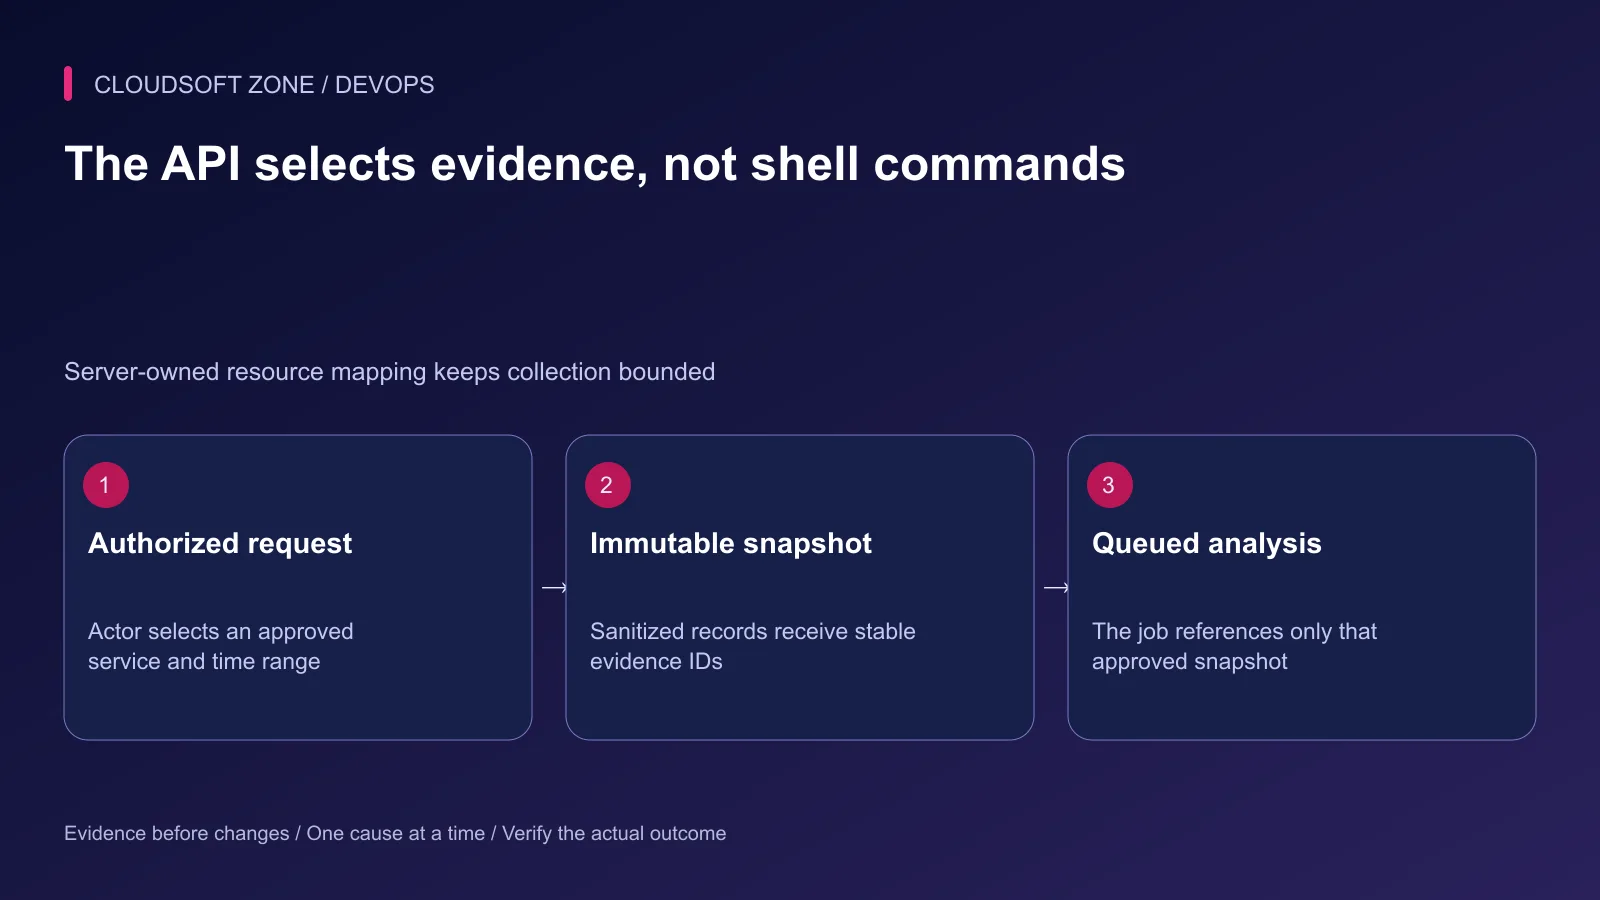
Accept an approved service ID, a bounded time range and an optional known release ID. The backend derives the actor and tenant from authenticated context. Never accept an arbitrary command, host address or filesystem path as the source.
Persist an analysis record before dispatch. Useful fields include actor, resource scope, evidence snapshot ID, input digest, provider configuration version, status, attempt count and actual completion time.
| State | Meaning | Visible behavior |
|---|---|---|
| Queued | Durable request accepted | Show its analysis ID |
| Processing | Bounded attempt active | Show start time without invented progress |
| Completed | Validated result stored | Link findings to approved evidence |
| Failed | Attempt cannot produce an accepted result | Show a safe error and retry eligibility |
Create the snapshot and dispatch through the existing transactional or outbox boundary. A job should not run before its evidence record becomes visible.
Step 2: Build the snapshot before contacting a provider
Select records through the existing logging backend with a service allowlist and explicit collection limit. Convert them into a small schema: evidence ID, event time, severity, event code, release reference and sanitized message.
Keep provider-submitted data separate from the original private record. Field allowlists are easier to review than sending an entire object and hoping a later redaction catches every sensitive value.
Remove cookies, tokens, passwords, personal payloads and private connection strings. Preserve a stable reference so an authorized operator can inspect the original later. Do not expose original records to a user merely because that user can view a summary.
Store the snapshot immutably for the analysis attempt. Re-running a query after generation can change the evidence set and make the result impossible to audit.
Step 3: Dispatch through the existing framework queue
In Laravel, use a normal queued job carrying only the persisted analysis ID. In NestJS, use the existing BullMQ queue and processor. Do not serialize a complete raw log export into Redis as the job payload.
// Application-owned job; authorization and snapshot creation happen first.
AnalyseLogSnapshot::dispatch($analysis->id)
    ->onQueue('log-analysis')
    ->afterCommit();
// Application-owned queue; the worker loads the approved record by ID.
await logAnalysisQueue.add('analyse-snapshot', { analysisId }, {
  jobId: analysisId,
  attempts: 2,
  backoff: { type: 'exponential', delay: 5000 },
});
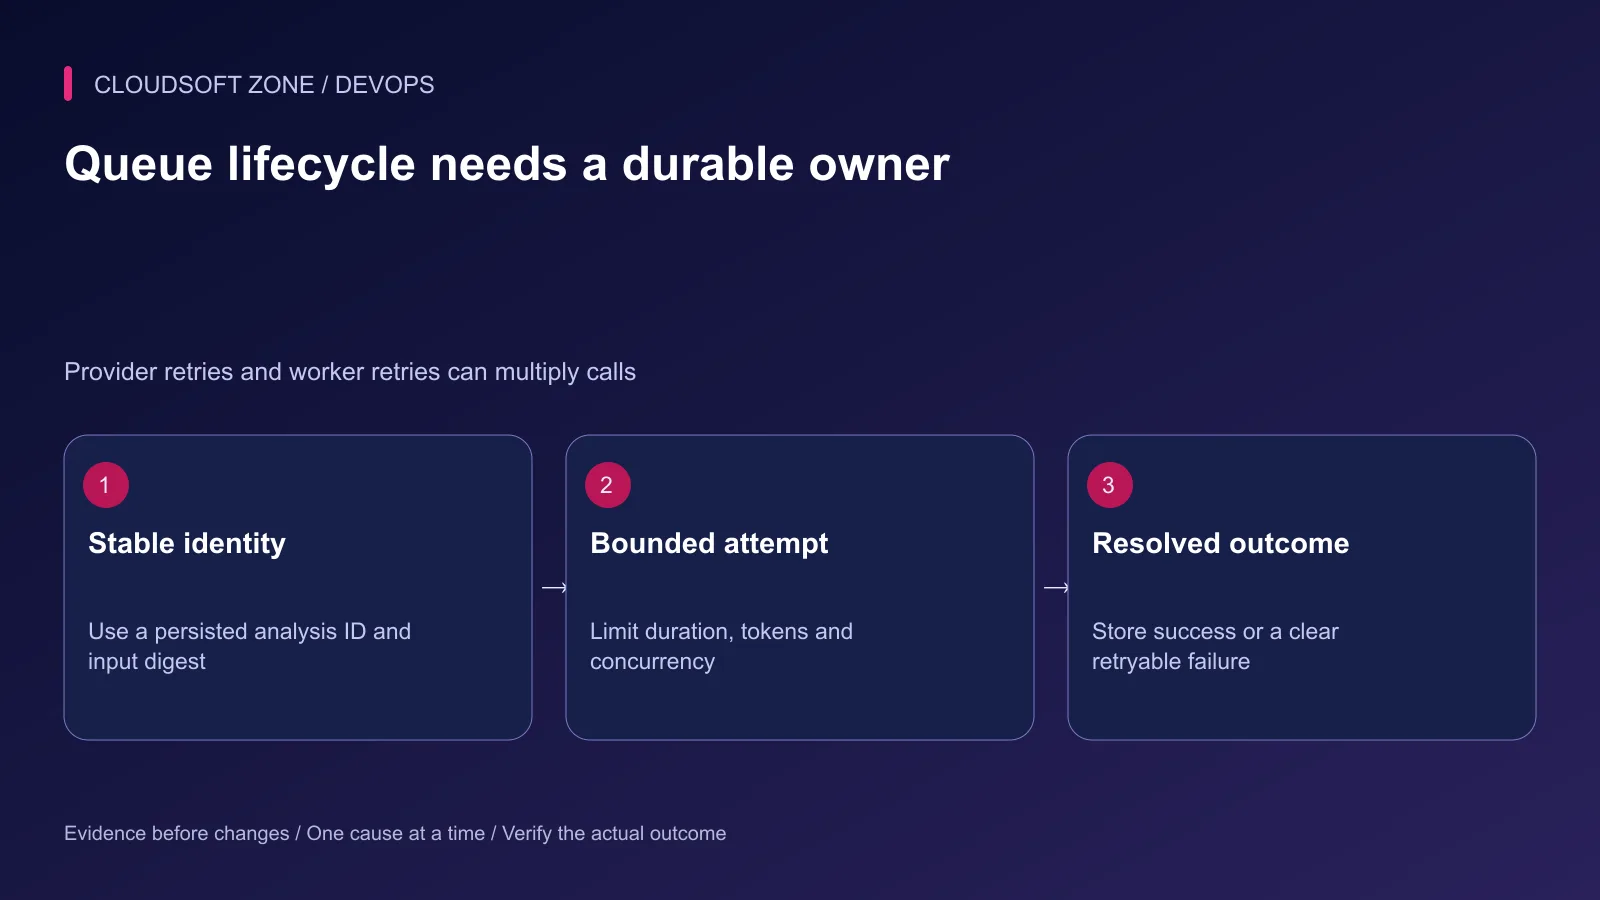
These snippets assume the named job and injected queue already exist. A stable job ID helps coordinate active duplicate submissions, but database state must still prevent repeated accepted results after jobs are removed or requests are replayed.
Use separate provider deadlines, job timeouts and worker concurrency limits. Laravel's worker timeout must fit its connection's retry_after or equivalent visibility behavior. BullMQ retries also need an application deadline; a retry count alone does not bound every network wait.
Step 4: Validate provider output as untrusted input
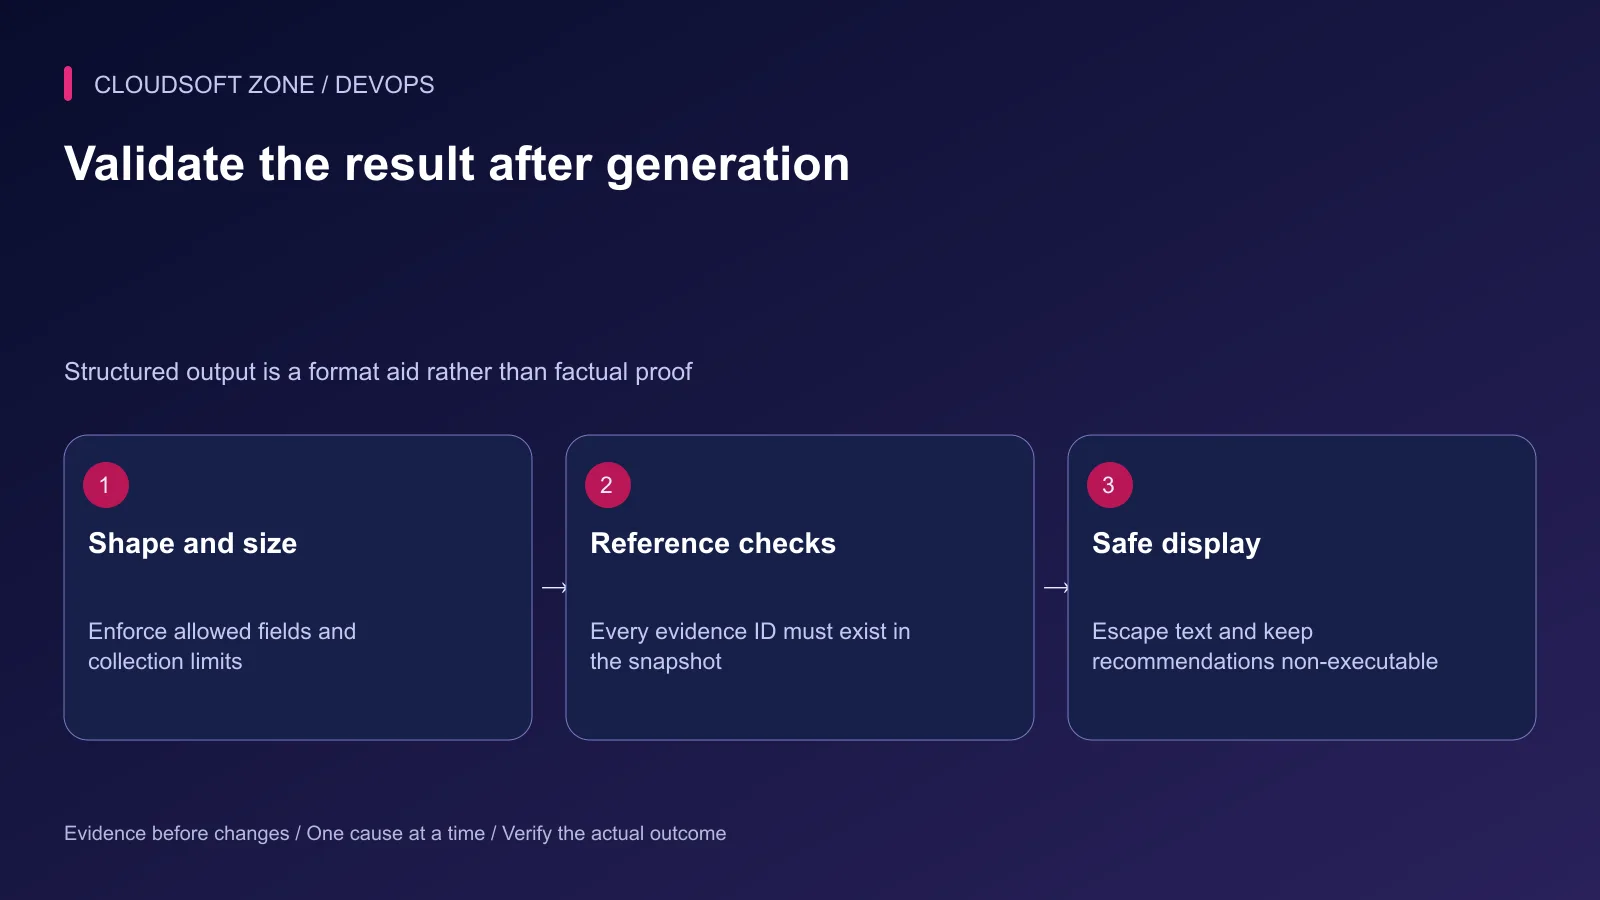
Ask for summary, findings and evidence IDs using the provider's supported structured-output feature. Then enforce your own contract. The following small validator demonstrates bounds and reference checks; integrate it after provider decoding and before persistence.
export function validateFindings(value, allowedIds) {
  if (!value || typeof value !== 'object' || Array.isArray(value)) {
    throw new Error('Invalid analysis object');
  }
  if (Object.keys(value).some(k => !['summary', 'findings'].includes(k))) {
    throw new Error('Unexpected analysis field');
  }
  if (typeof value.summary !== 'string' || value.summary.length > 2000) {
    throw new Error('Invalid summary');
  }
  if (!Array.isArray(value.findings) || value.findings.length > 8) {
    throw new Error('Invalid findings');
  }
  for (const finding of value.findings) {
    if (!finding || typeof finding !== 'object' || Array.isArray(finding) ||
        Object.keys(finding).some(k => !['claim', 'evidenceIds'].includes(k))) {
      throw new Error('Invalid finding object');
    }
    if (typeof finding.claim !== 'string' || finding.claim.length > 1000 ||
        !Array.isArray(finding.evidenceIds) || finding.evidenceIds.length < 1 ||
        finding.evidenceIds.length > 10 ||
        finding.evidenceIds.some(id => typeof id !== 'string' || !allowedIds.has(id))) {
      throw new Error('Invalid evidence-backed finding');
    }
  }
  return value;
}
Also cap raw response bytes before decoding, handle refusals and incomplete responses explicitly, and impose a provider token budget. Referenced evidence establishes traceability, not whether the claim logically follows from that evidence.
Step 5: Display findings without creating an execution channel
Escape model text through the normal UI renderer. Avoid raw HTML or clickable arbitrary commands. Evidence links should resolve through a backend endpoint that rechecks the viewer's scope.
Offer a clear operator review state. Confirmed findings and generated hypotheses should not look identical. Keep a rejected finding for evaluation with the appropriate retention controls rather than silently rewriting history.
Step 6: Rehearse failures and retention
| Case | Expected result |
|---|---|
| Unknown service or another tenant | Request denied before collection |
| Prompt injection inside a log message | Treated as evidence text only |
| Invented evidence ID | Result rejected |
| Provider timeout | Bounded failure with evidence retained |
| Duplicate job delivery | One accepted analysis outcome |
| Deleted or expired snapshot | Explicit unavailable state, not invented findings |
Set retention for raw snapshots, submitted redacted inputs and generated summaries separately. Avoid retaining customer-sensitive incident exports indefinitely just because the queue completed successfully.
Our Laravel idempotent AI jobs guide covers repeat-delivery controls. For this analyser within your existing stack, discuss the implementation with Cloudsoft Zone.
Featured image: Cloudsoft Zone technical layout with nestjs artwork by NestJS (Public domain). Product mark resized proportionally for identification; no endorsement implied. Layout: CC BY-SA 4.0.
Frequently asked questions
Should the analyser read arbitrary paths supplied by users?
No. Map authorized service IDs to server-owned log sources and enforce a bounded time range and record limit.
Does structured model output guarantee the analysis is correct?
No. Validate schema, limits and evidence IDs, then require an operator to confirm factual conclusions.
Why put analysis on a queue?
It separates slow provider work from the HTTP request and supports bounded concurrency, durable status and deliberate failure handling.
Sources
- Laravel queue jobs and timeout behavior — Laravel
- NestJS BullMQ integration — NestJS
- NestJS request validation — NestJS
- Sensitive logging and output protection — OWASP
- Structured provider output — Anthropic
- Prompt injection risks in retrieved text — OWASP
Read next
TutorialDevOps5 min read
Laravel CI/CD with GitHub Actions: verification, release artifacts and guarded deployment
Build Laravel CI/CD with GitHub Actions using locked dependencies, isolated verification, immutable release artifacts and a protected deployment job with explicit recovery gates.
Comments
No comments yet. Be the first to join the conversation.
Leave a comment
Every comment is read by a moderator before it appears. Your email address is never published; it is used only to contact you about this comment.
More from Cloudsoft Zone
TutorialDevOps6 min read
Docker health checks: why a running container is not proof that the application is healthy
Design Docker health checks around bounded application readiness, distinguish them from liveness and public-path checks, and connect each failure signal to a deliberate response.
By Nilesh Kushvaha
TutorialDevOps6 min read
Laravel Docker Compose with nginx, MySQL and Redis: separate images, workers and retained data
Design a Laravel Docker Compose stack with matching PHP/nginx artifacts, private database and Redis services, explicit worker lifecycle and retained storage contracts.
By Nilesh Kushvaha
TutorialDevOps5 min read
nginx PHP upload limits: safely increase file sizes without exposing the server
Align nginx PHP upload limits with multipart overhead, PHP-FPM configuration, Laravel validation and temporary-storage capacity. Diagnose 413 errors before raising every limit.
By Nilesh Kushvaha